Total: $0.00
Taxes and shipping calculated at checkout

Installation guide
Your mosaic arrives on numbered mesh sheets. Any tile installer lays it like a puzzle, then grouts it like regular tile.
Four simple stages, the same as laying regular tile.
Each section is clearly numbered, so nothing is left to guesswork.
Your installer spreads tile adhesive on a clean, level floor or wall.
The numbered sheets go down in order, following the layout guide.
Grout locks everything together. Then it is ready for daily foot traffic.
Share this with your installer. The layout guide in the box shows where every numbered sheet goes.
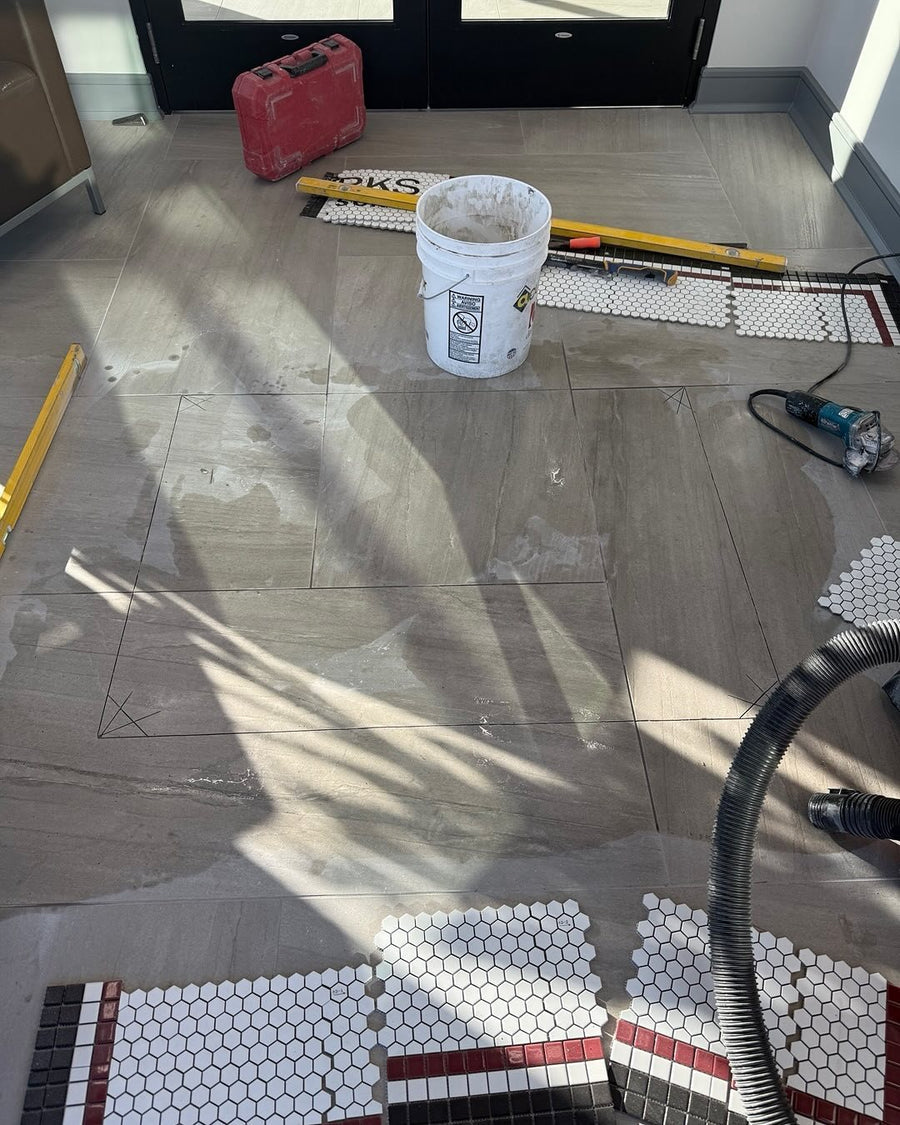
Clean the area, repair any damage and make sure the surface is level and smooth. If the mosaic goes into an existing floor, mark the outline and cut the old tile out first.
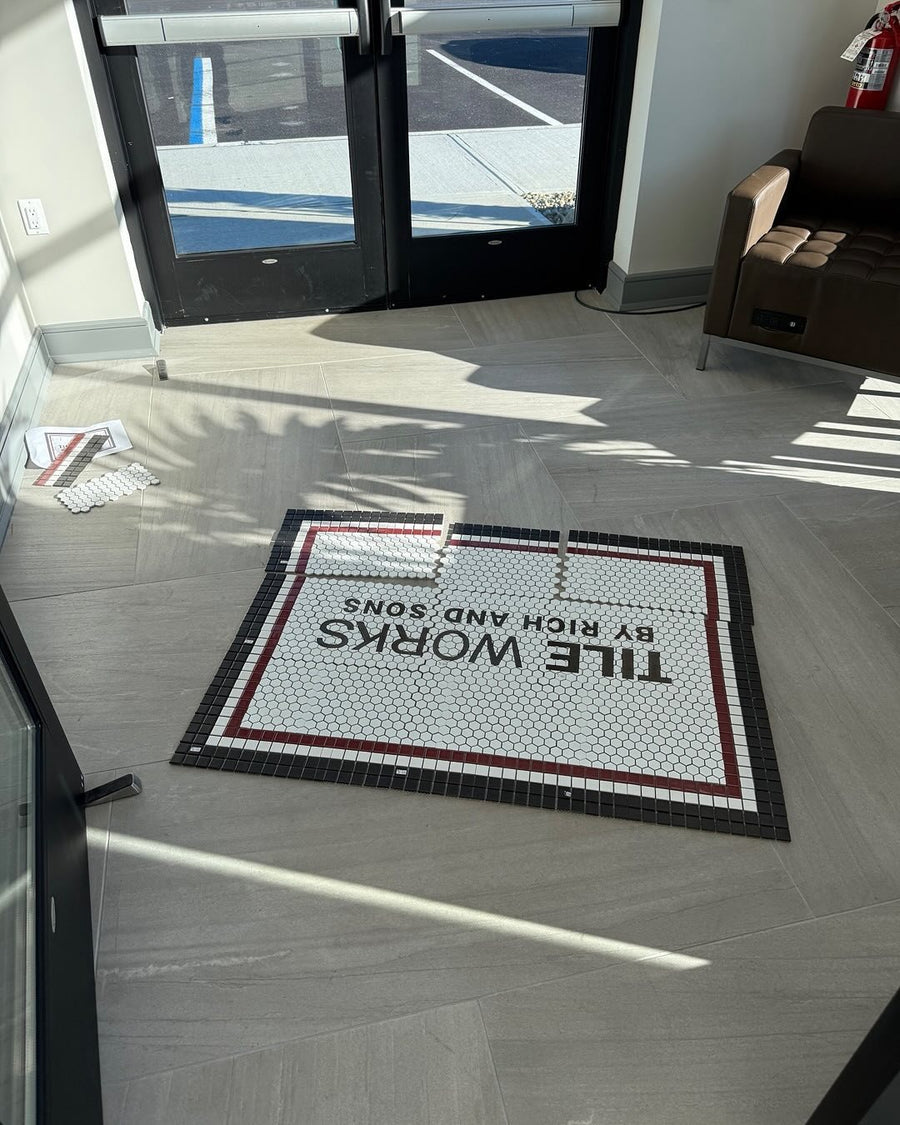
Before any adhesive, lay the mesh sheets out in number order, following the layout guide. This checks the fit and shows the finished design.
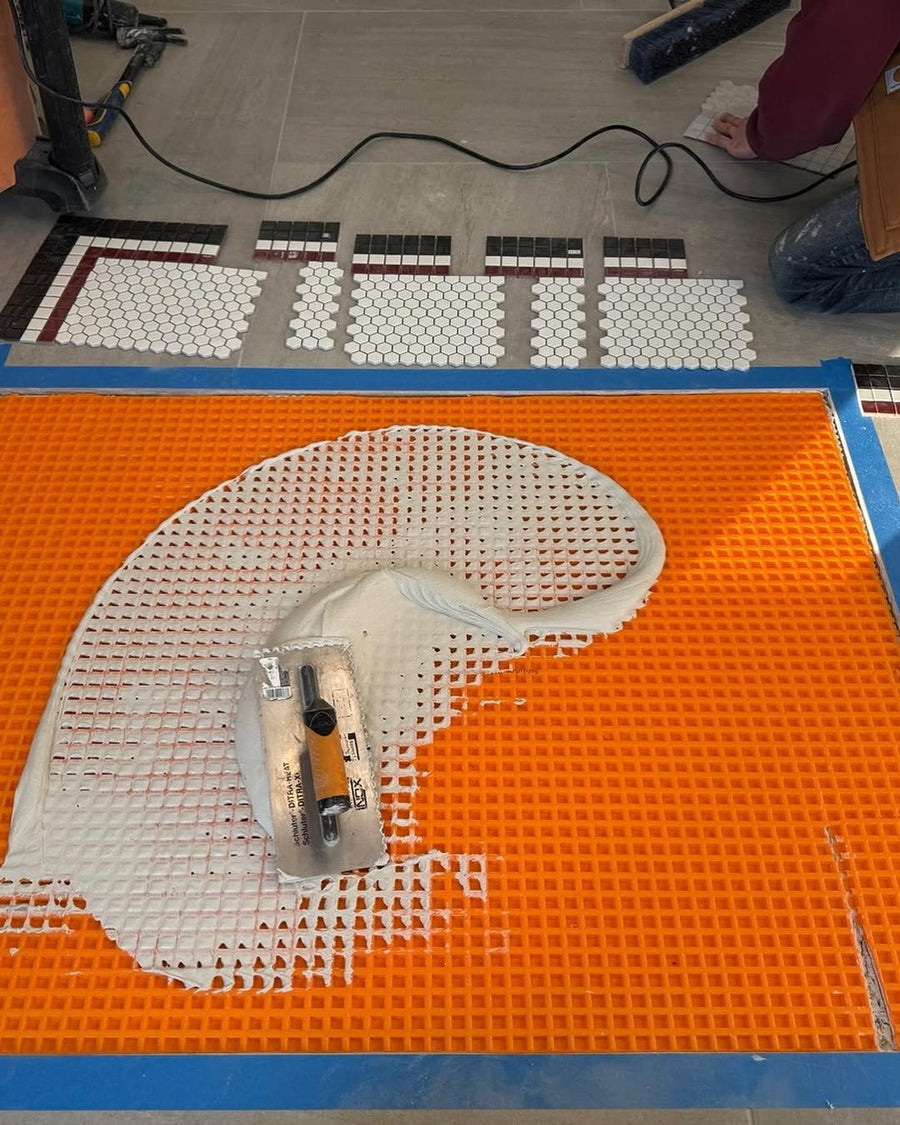
Spread a cement-based tile adhesive with a notched trowel, working one section at a time so it does not skin over. See the adhesive guide below for your tile type.
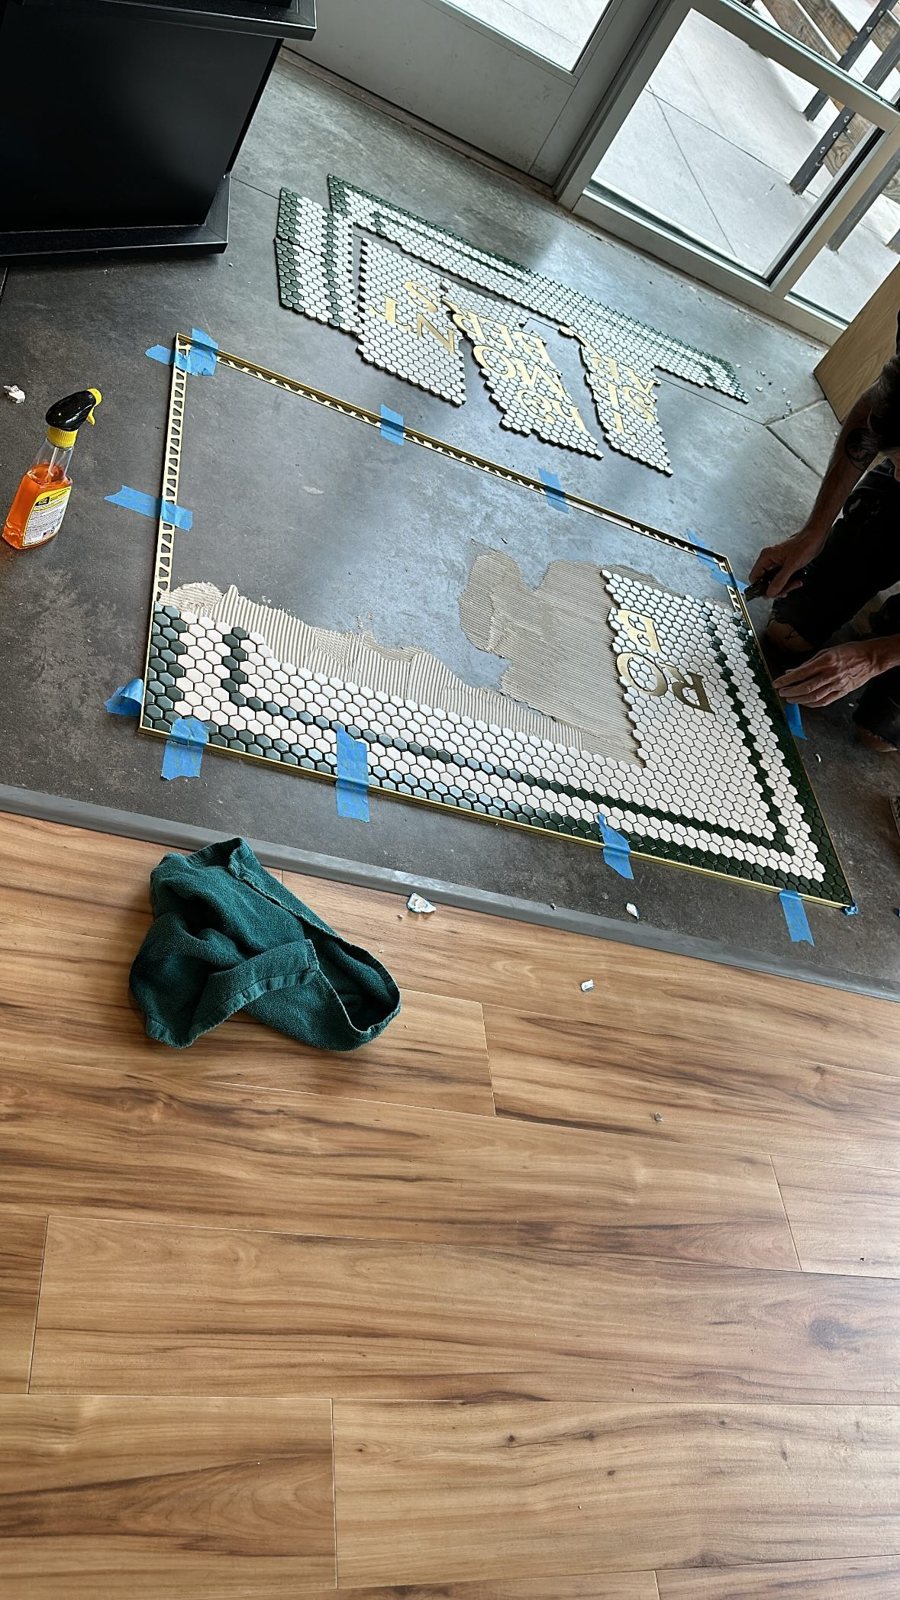
Press each sheet into the adhesive in number order, mesh side down, and tap it level. Keep the joints between sheets the same width as the joints inside them. Metal letters sit flush with the tile.
Once the adhesive has set, apply grout between the tiles to fill the gaps, then wipe the surface clean. This secures the tiles and gives the finished look.
Depending on the tiles, you may need to seal the surface to protect it from moisture and stains. Marble and other natural stone should always be sealed.
The right adhesive depends on the surface and the type of tile in your mosaic.
Use a cement-based adhesive made for porcelain. It bonds well with the dense, hard surface of porcelain.
Use a thin-set (cement-based adhesive mixed with water) made for glass tiles.
The right adhesive depends on the type of stone. Check with the adhesive maker or a professional installer.
A few simple habits keep your mosaic looking new for years.
Sweep or vacuum, then mop with a mild cleaning solution.
Stick to mild cleaners and skip abrasive scrubbers that can scratch the surface.
The sooner a stain is cleaned, the easier it comes out.
If water stops beading on the surface, it is time to reseal.
Our tiles are already slip-resistant. For extra safety you can add an anti-slip layer.
No. Any experienced local tile installer can do it. The mosaic goes down like regular tile, on numbered sheets with a layout guide.
Your mosaic on pre-assembled, numbered mesh sheets, a layout guide showing where each sheet goes, and extra tiles for small repairs.
Use the extra tiles for small chips. For larger damage, send us photos of the box and the damaged section and we will send a replacement section free.
Our tiles are slip-resistant. If you would like extra grip, for example at a wet entrance, you can add an anti-slip layer after installation.
Sweep or vacuum, then mop with a mild cleaner. Avoid harsh chemicals and abrasive scrubbers, and reseal when water stops beading.
Send us a photo of your space and we will help you and your installer plan it, or start with a free mockup.
 USD
 CAD
 EUR
 AUD
 GBP
 JPY